Tuesday, April 10, 2012

Wow...there's a bunch of windows!

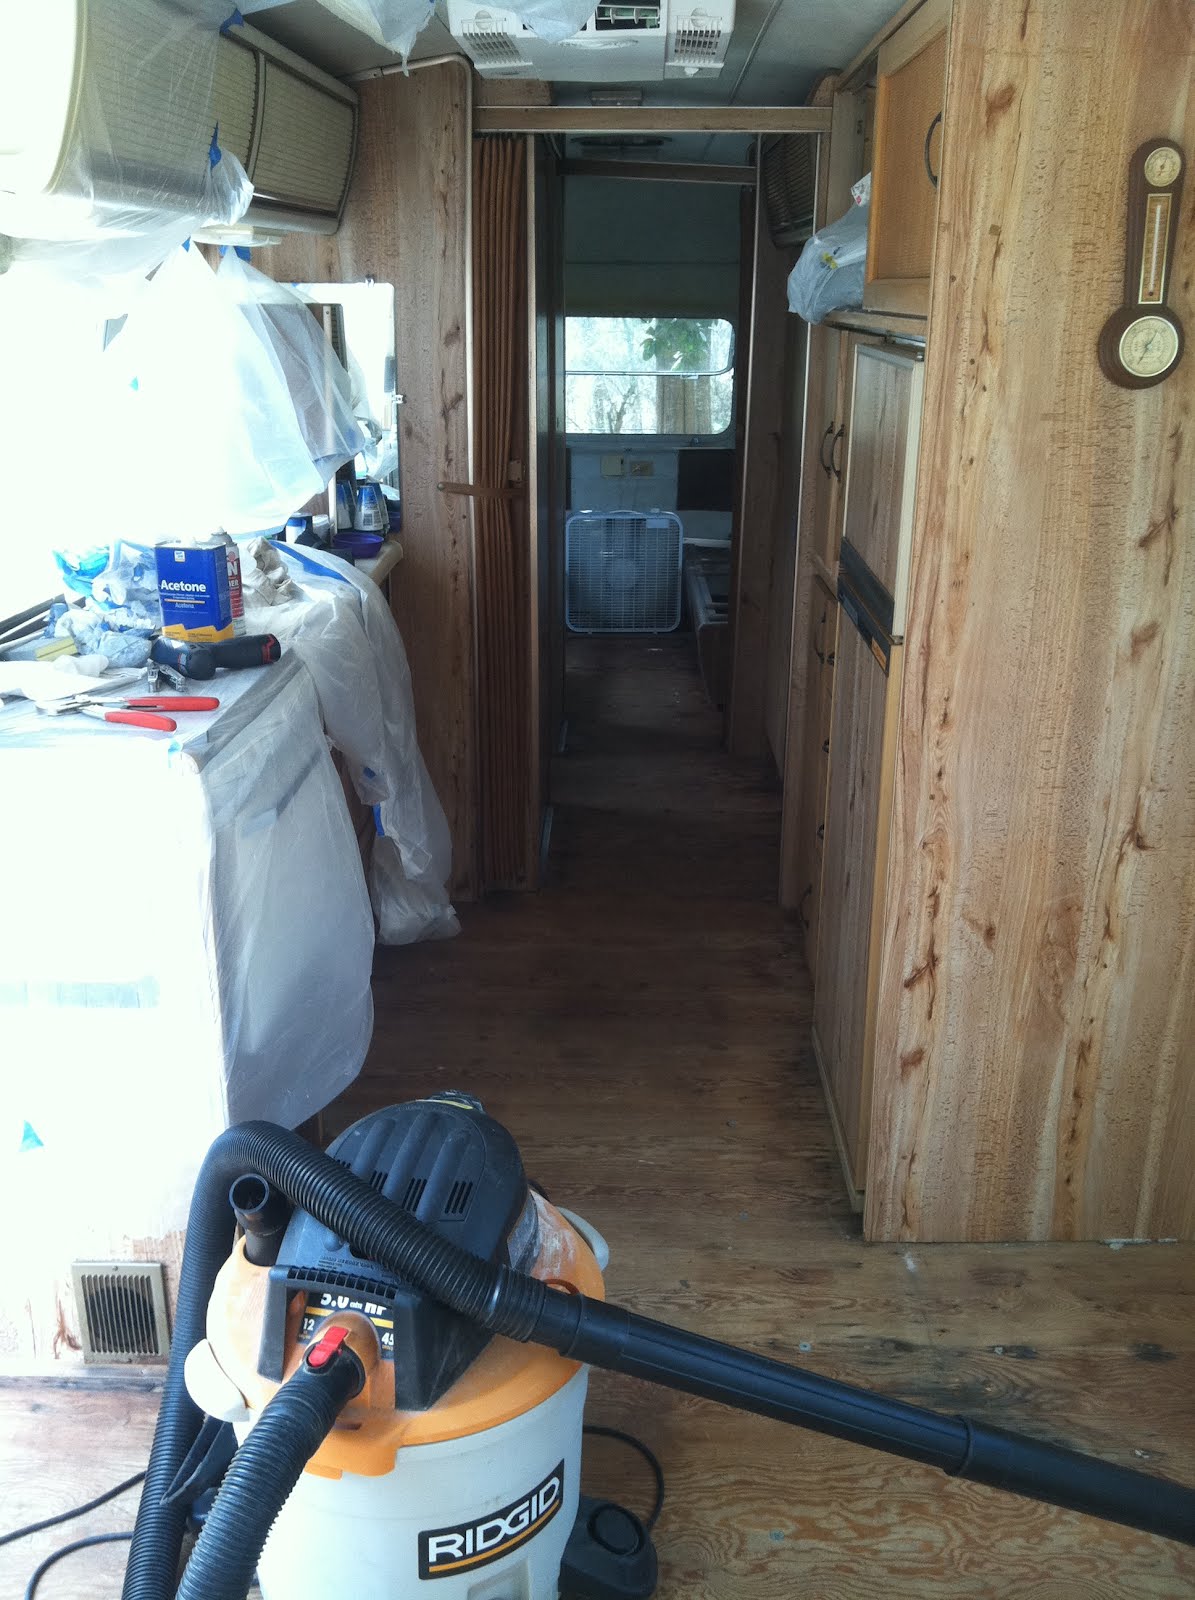
[Note: all of the windows were completed prior to installing the new floors]

Having 9 windows, 8 of which are operable, presented quite the task when it came time to replace the baked on and cracking window seals/gaskets with new ones. We knew the rear window seal was leaking after several downpours in our driveway, so there was no choice as to replace or not to replace. I spent a whole Saturday removing the majority of the old seals on four of the windows, but the rock hard adhesive remained.

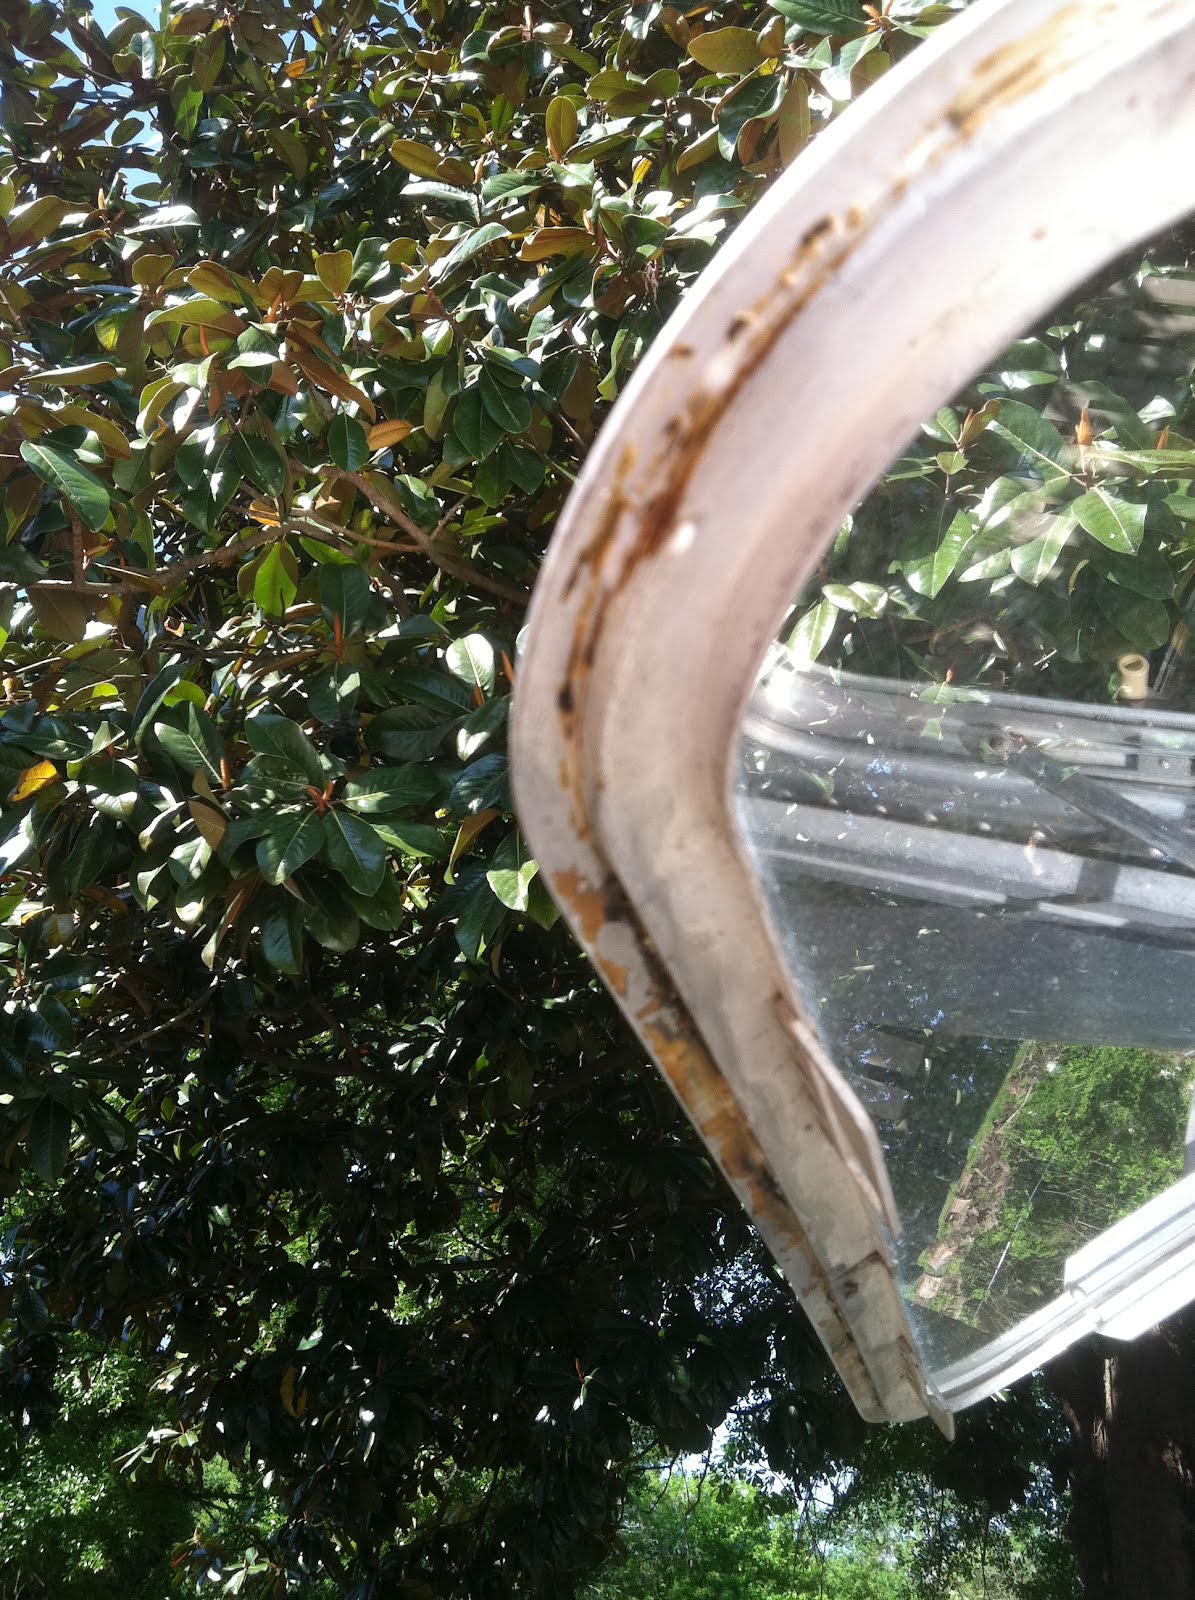
To do it correctly, all of the old adhesive would have to be removed. Together, we spent Sunday morning suffering through picking, chiseling, scraping and dremeling off old seals...upside down, backwards and twisted. I couldn't take it anymore, so I jumped on-line at www.airforums.com and found advice from others recommending Permatek Gasket Remover sold by auto parts stores. I bought out three different auto parts stores...there were only three 4oz. bottles to be had. It definitely made the work MUCH easier! Especially once we dropped the awnings and the sun quit evaporating the remover before we could get to it. Here are a few photos of this grueling task:

......

Squeaky Clean!!

Rain was headed our way so the new gaskets had to go on that day...even at 10:00 at night!

As you can see, the new gaskets fit snugly and are just what Llamaluminum needed!
......

Final touch on the windows was to replace all the screens. Joy. Airstream installed white screens with white spline originally on the roof vents and gray screen with white spline on the windows. No luck finding white screen or white spline, so we went with black on black for it all...at least they're clean and hole free!


Monday, April 9, 2012

Flooring...Light at the End of the Tunnel

You can see from the photos below how disgusting the carpeting was!

...

...

......

Fortunately and unfortunately it took a total of 30 minutes to tear out the old carpeting and carpet padding due to it's aged and water-damaged state. Unfortunately it took the next two days and part of another weekend to prepare and repair the original subfloor before we could install new flooring.

The short video below shows the general condition of the entire subfloor (turn your speakers down first...the cutting tool turns on part way through):


[I don't see the video when I preview it, so it may not show up...sorry!)


One shot of the front floor and one looking down the hallway:
...

Under the stereo cabinet:

Benny contemplating, cutting a 'research' hole and then digging into the rest:
......
Outcome: Benny fashioned a 'brace' out of angle iron, attached it at a 45 degree angle to the frame underneath the patch piece.

The next photo is of the hole caused by the curb side stabilizing jack that punched through the undercarriage up through the subfloor.
......

Here is the subfloor patched, prepped and ready for finish floor:

Now for the good stuff! We looked at cork, vinyl, laminate, etc. and decided on engineered bamboo for its durability, tightly-stranded pattern and environmental friendliness. Installation began late in the afternoon and went on into the 14th hour of work that day. We are so happy with the finished product. We'll see how it holds up to two boys, sand, dirt and a dog...

...

......


...


Tape It Off, Tape It Off Some More then PAINT it!

We decided the bulkhead (the yellow/beige plastic header above the gaucho (which is what a travel trailer couch is called)) needed some freshening up...which led to the lower fixed windows' frames 'needing' freshening up, which led to the kitchen upper cabinet end cap and spice rack 'needing' freshening up...which led to our friends' going hog-wild in their 1974 Trade Wind!

The original bulkhead:

The original lower window frames:

Painting Time
...

Finished
...

Now for the floor!! Can't wait to put it all back together...

More Exterior Photos

Here are some more exterior photos:

Curb Side
......

Street Side
......

Roof View..................................Decals & Missing Striping/Beltline
...

At Home...


Welcome Home, Llamaluminum!

Here we go! Mar 2 we purchased our new family project. We're a little more than a month in and what a beast this project is. Fortunately, it is a very satisfying one!

Here she is still on the lot:


Here we are preparing to leave South Carolina and take her home:

As purchased, it had the original carpet (gross!) which we ripped out the first day and discovered bow and aft water damage/rot on the floor, two holes in the under carriage from its stabilizing jacks...front curb punctured through the floor, no vulkem in the seams, lacking or cracked ext trims, baked/cracking window gaskets, 'holey' window screens, very yellowed bulkhead, street window frames and spice rack, broken bathroom slide door, missing roof vent fan and missing main door entry key. Here are some photos of the original interior:

Diggin' that gorgeous '80's fabric!


Looking from Living Room back toward Bedroom:


Teenie-Tiny Bathroom:


Bathroom Shower...


Rear Twin Bedroom


On the plus side, all of the appliances, A/C, Furnace, Water Heater, electrical outlets, vents, windows, doors, cabinets, tambours, folding privacy doors, rock guard windows, axles, etc. are in great working order. The seller put new tires on it the day prior to our purchasing it as they were well-cracked.

To date, Apr 9, we've removed remaining vulkem in the seams and installed new vulkem in all of the seams (about 40hrs of work), removed and replaced window gaskets (another 40hr job), replaced all window screens, removed carpet/pad/staples (is it necessary to use 1,000 staples in each square foot???), prepped and painted the bulkhead & lower window frames with textured paint, painted the spice rack, repaired the flooring, installed engineered bamboo flooring throughout, dry-cleaned, repaired (with slides) and reinstalled curtains, removed old window shades and replaced with new ones, removed old missing key lock on main entry door and replaced with ordered new one, removed gaucho for repair, re-built gaucho bin support, sent gaucho cushion & arm-rests off for recovering, recovered wall pieces, front face of gaucho & cabinet end caps, and are currently working on rebuilding the ends of the gaucho (storage frames) and recovering them, reinstalled gaucho and reinstalled/reconnected the stereo cabinet.

More photos to come!